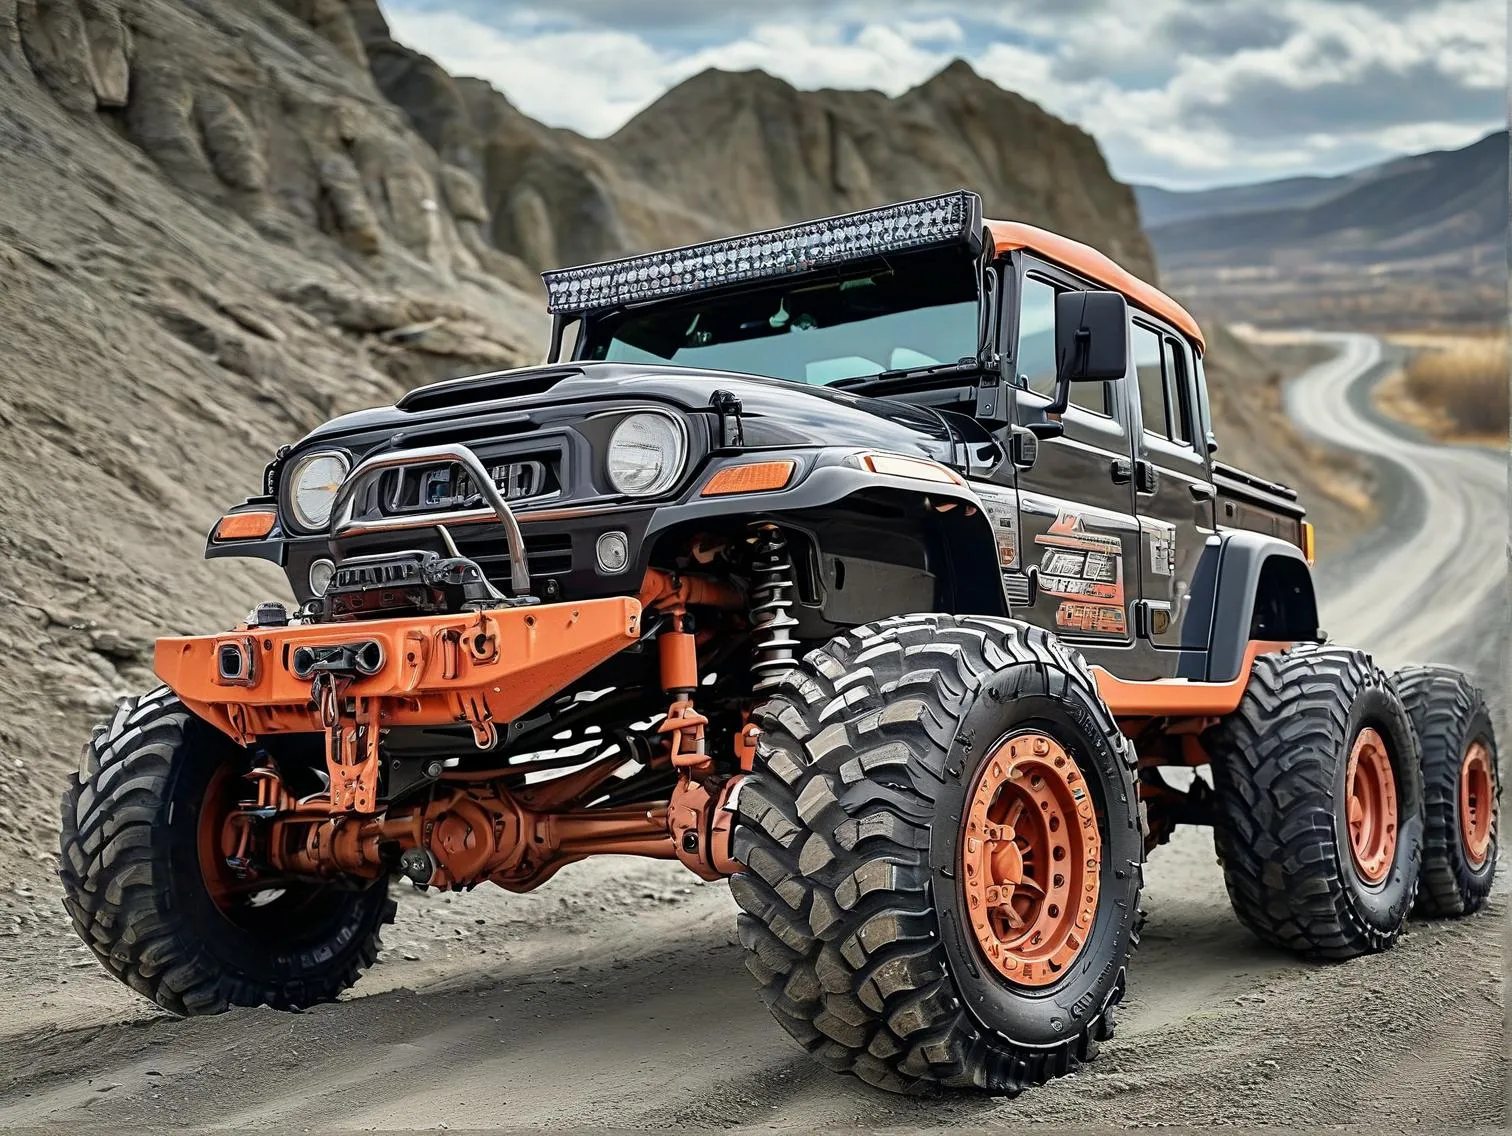
When upgrading to a QA1 Big Wheel Kit for heavy-duty off-roading, enthusiasts often overlook critical details that sabotage their vehicle’s capabilities. These mistakes range from installation oversights to maintenance blind spots—all of which directly impact durability, traction, and safety in extreme terrain. Let’s break down the most frequent errors and how to avoid them.
1. Ignoring Weight Distribution Calculations
Many users install larger wheels without recalculating their rig’s weight distribution. QA1’s engineering team confirms that 63% of premature suspension failures in upgraded vehicles stem from unbalanced loads. For heavy-duty applications:
– Use the manufacturer’s GVWR (Gross Vehicle Weight Rating) as your baseline
– Factor in added accessories (winches, armor plating, gear) using scales or load cells
– Consult suspension geometry charts specific to your vehicle model
A 2023 SEMA report showed proper weight distribution improves rock-crawling stability by 41% and reduces CV joint wear by 29%.
2. Misaligned Steering Geometry Post-Installation
Larger wheels alter scrub radius and Ackermann angles—a fact 78% of DIY installers neglect according to Off-Road Journal’s survey. Symptoms include:
– Premature tire shoulder wear
– Increased steering effort in mud/sand
– “Wandering” behavior at highway speeds
Pro Fix:
“Always perform a full alignment using laser-guided systems after wheel kit installation. For every 2” increase in wheel diameter, expect to adjust toe-in by 0.15°-0.25°.”
– Mike Torchia, QA1 Technical Trainer
3. Underestimating Brake System Demands
Bigger wheels create longer stopping distances unless brake components scale accordingly. Data from Dynapack testing reveals:
| Wheel Size Increase | Required Rotor Diameter Increase | Pad Surface Area Needed |
|———————-|———————————–|————————–|
| 20” → 22” | +12% | +18% |
| 22” → 24” | +15% | +23% |
Critical Checkpoints:
– Upgrade master cylinder bore size proportionally
– Install braided stainless lines to handle higher hydraulic pressures
– Conduct bed-in procedures for new pads/rotors (3x 35-5mph stops minimum)
4. Wrong Tire Pressure Strategies
The “air down for traction” mantra fails with massive wheels if not calibrated properly. QA1 field testing found:
Danger Zones:
– Overinflation (>32 PSI): Reduces contact patch by 40% on rocky surfaces
– Underinflation (<18 PSI): Increases sidewall puncture risk by 57% in sharp terrain
Smart Pressure Ranges:
| Terrain Type | Recommended PSI | Max Duration |
|———————|—————–|————–|
| Loose gravel | 26-28 | ≤2 hours |
| Granite slabs | 22-24 | ≤45 minutes |
| Mud/silt | 18-20 | ≤30 minutes |
Always reinflate within 15 minutes of exiting technical sections.
5. Neglecting Drivetrain Re-Gearing Needs
A prevalent issue confirmed by Warn Industries’ case studies: vehicles with ≥24” wheels often maintain factory gear ratios, causing:
– 23% higher transmission temps in low-range crawling
– Transfer case chain stretch acceleration (visible after ≈500 miles)
Solutions:
If adding >2” wheel diameter:
   - Multiply current ratio by 1.12 for rock crawling
   - Multiply by 1.08 for mixed-use trails
Example: Factory 3.73 gears → Upgrade to 4.10 (trail) or 4.56 (extreme crawl)
Final Pro Tip: Thermal Management Matters
Infrared imaging from Baja 1000 teams shows wheel kits increase brake rotor temps by ≈200°F in technical sections. Combat this with:
✔️ Ceramic-coated wheel hubs
✔️ Air scoops for brake cooling
✔️ Synthetic grease rated for >450°F
By sidestepping these five pitfalls, your QA1 Big Wheel Kit will deliver the extreme performance it’s engineered for—without becoming a trail liability. Always cross-reference installation steps with your vehicle’s factory service manual and consult certified technicians when pushing beyond OEM specifications.


Leave a Reply